I created this 3D to discuss about crucible automation, since I think it would be interesting for all players playng GT6. Actually the converation started here but a dedicated 3D was needed. Different aspects have arlready been discussed there so I suggest you to give a look.
3 Likes
So since when is 3D another word for Thread? Pretty sure it means 3 Dimensions lol.
Molds do accept Liquids, but the Crucible doesn’t allow Liquids to be extracted from it due to the Temperature differences, that’s why for automation of Alloys and such that happen to have Fluids a Smelter and a Mixer are recommended, which then output via Pipe into a Mold. Molds do accept Fluids, Crucibles do too but that doesn’t make sense to pour already molten stuff into a Crucible.
3 Likes
3D was used a very old abbreviation for thread as well. I guess it’s not used anymore  .
.
Anyway, yes of course the smelter is an easier solution but you need a while to reach the point where you can produce tungsten for the crucible needed for the smelter. So automating the crucible can really help during early game.
2 Likes
Molds have an automatic pour mode (which can also react to redstone). Hoppers, Pistons and Sensors together with a fuckload of Redstone can automate and semiautomate the Crucible quite easily.
1 Like
yes i know but if you read my post in the other thread , the problem is that most of the time you have 3 sides occupied by sensor and only 1 side for the mold. Most of the time you cant output fast enough and the crucible overheat.
2 Likes
I’ve never heard that and I’ve been on messages boards and IRC and more since pre-internet BBS days. ^.^;
1 Like
Tried using the “Universal Extender”? Or depending on purpose, a 24 Nugget Mold? Or Pincers to grab the poured Material out of the Mold instantly without getting Fire Damaged to Hell. Or dropping in additional Material to cool down the Crucible. 
1 Like
mm ill try the universal extender. does it need aluminum? I use gear or saw mold becouse they need more metal. But, still, u need to convert the back to plates or rods. The purpose of this is a full automation so using pincers or puring additional material are not helpfull.
EDIT: I saw the recipe of the universal extender… and they are quite hard to craft because of the circuits. In dont think it is the right soultion here since all this sould be for early game.
2 Likes
Yeah it’s a complicated Setup that way. I am planning on some way to enable more molds per Crucible, just not sure yet how exactly I would do that. Until then there is this one thing I did with Miniature Nether Portals and a Chunkloader in the Nether that enabled countless Molds per Crucible.
4 Likes
mmm interesting concept  how does that work? Did you put the portal next to the crucible and than you connected all the portal next to the mold to it? Glad to hear that you are planning something to use more molds! that would be very nice
Edit: Im not really sure how you pour the metal from the cucible to the portal
Edit2: I fugured it out i was using the wrong side
Edit3: It works with sensors as well. It just works like an universal extender. The only problem is to use this with multiple crucible. It will be tricky to link them in the correct way
4 Likes
3 sides occupied by sensor and only 1 side for the mold
I think 2 sensor can do same things.
(If I say wrong whings, please ignore, my English level is too bad:))
I had made a video a long time ago so share it:)
Recipe : Limonite 8 : Carbon 1 -> Iron 2
Front Thermomator(for piston to stop burning) : >1900K
Back Thermomator(for Mold and Dropper) : >1811K
Mold setting(with Monkey Wrench) : Auto-Input ON(hit handle |~| ), Redstone(hit bottom)
This way can be used for 2 unit output recipe.
If you can use Electric Heater, you can re-burn so you can set Low-temperature thermomator setting.
It means you can decrease explosion risk, and you can use another automatic crucible recipe such as Bronze.
4 Bronze is created at once and you can only use 2 Mold, useally it is clogged up if you don’t use Electric Heater.
5 Likes
nice setup but it doesnt refill the crucible automatically. for that you need a weigh-o-meter as well. At the end you only have 1 side free
4 Likes
The Redstone Connected Sensor at the front can be placed ontop of the Crucible facing backwards and then adjusted with the monkey Wrench to Detect whatever is below it while it still faces backwards physically, giving you space for one more Mold, just be sure to not have Droppers/Dispensers adjacent to the Sensor itself, meaning you should just put it one further up, and then use something like Microblocks, unused Sensors, Trapdoors or alike to adjust the flight trajectory of the dropped items fro mthe back droppers properly.
3 Likes
Oh and before i forget, GT6 Hoppers place Items centered in front of them without any trajectory, so combined with a very short Redstone pulse to emit Stacks of an exact Size to their Output, it makes a better subsitute for those Droppers.
2 Likes
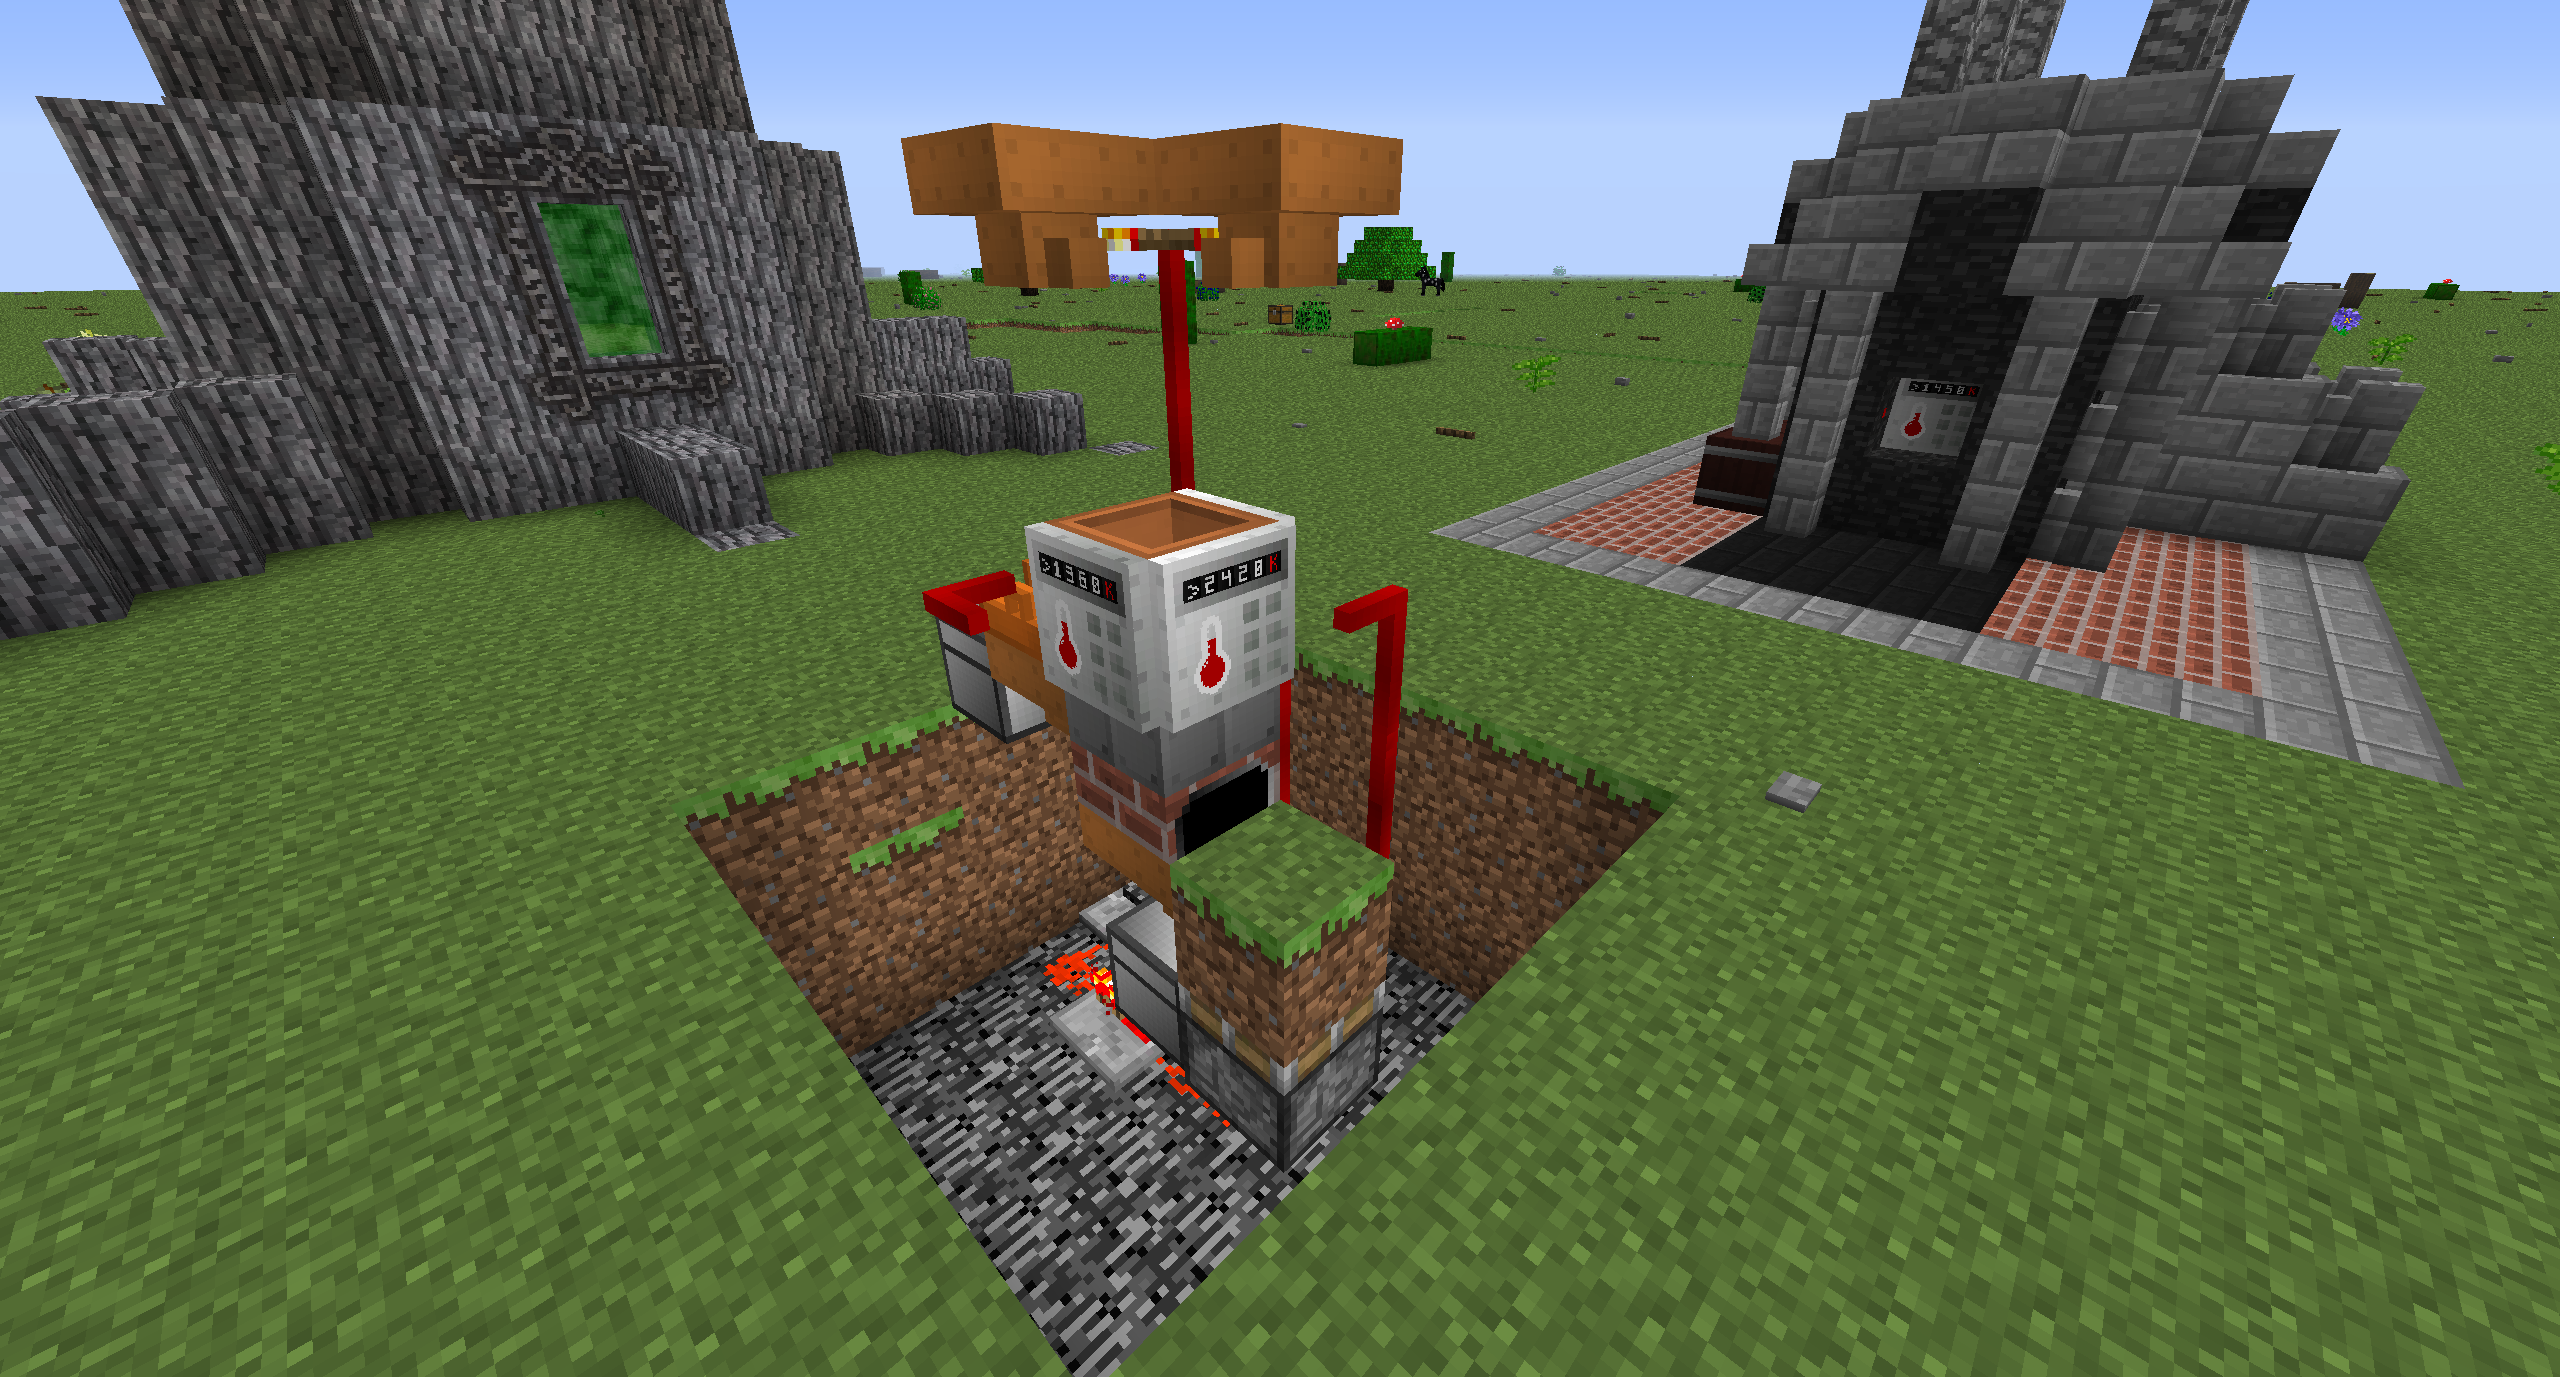

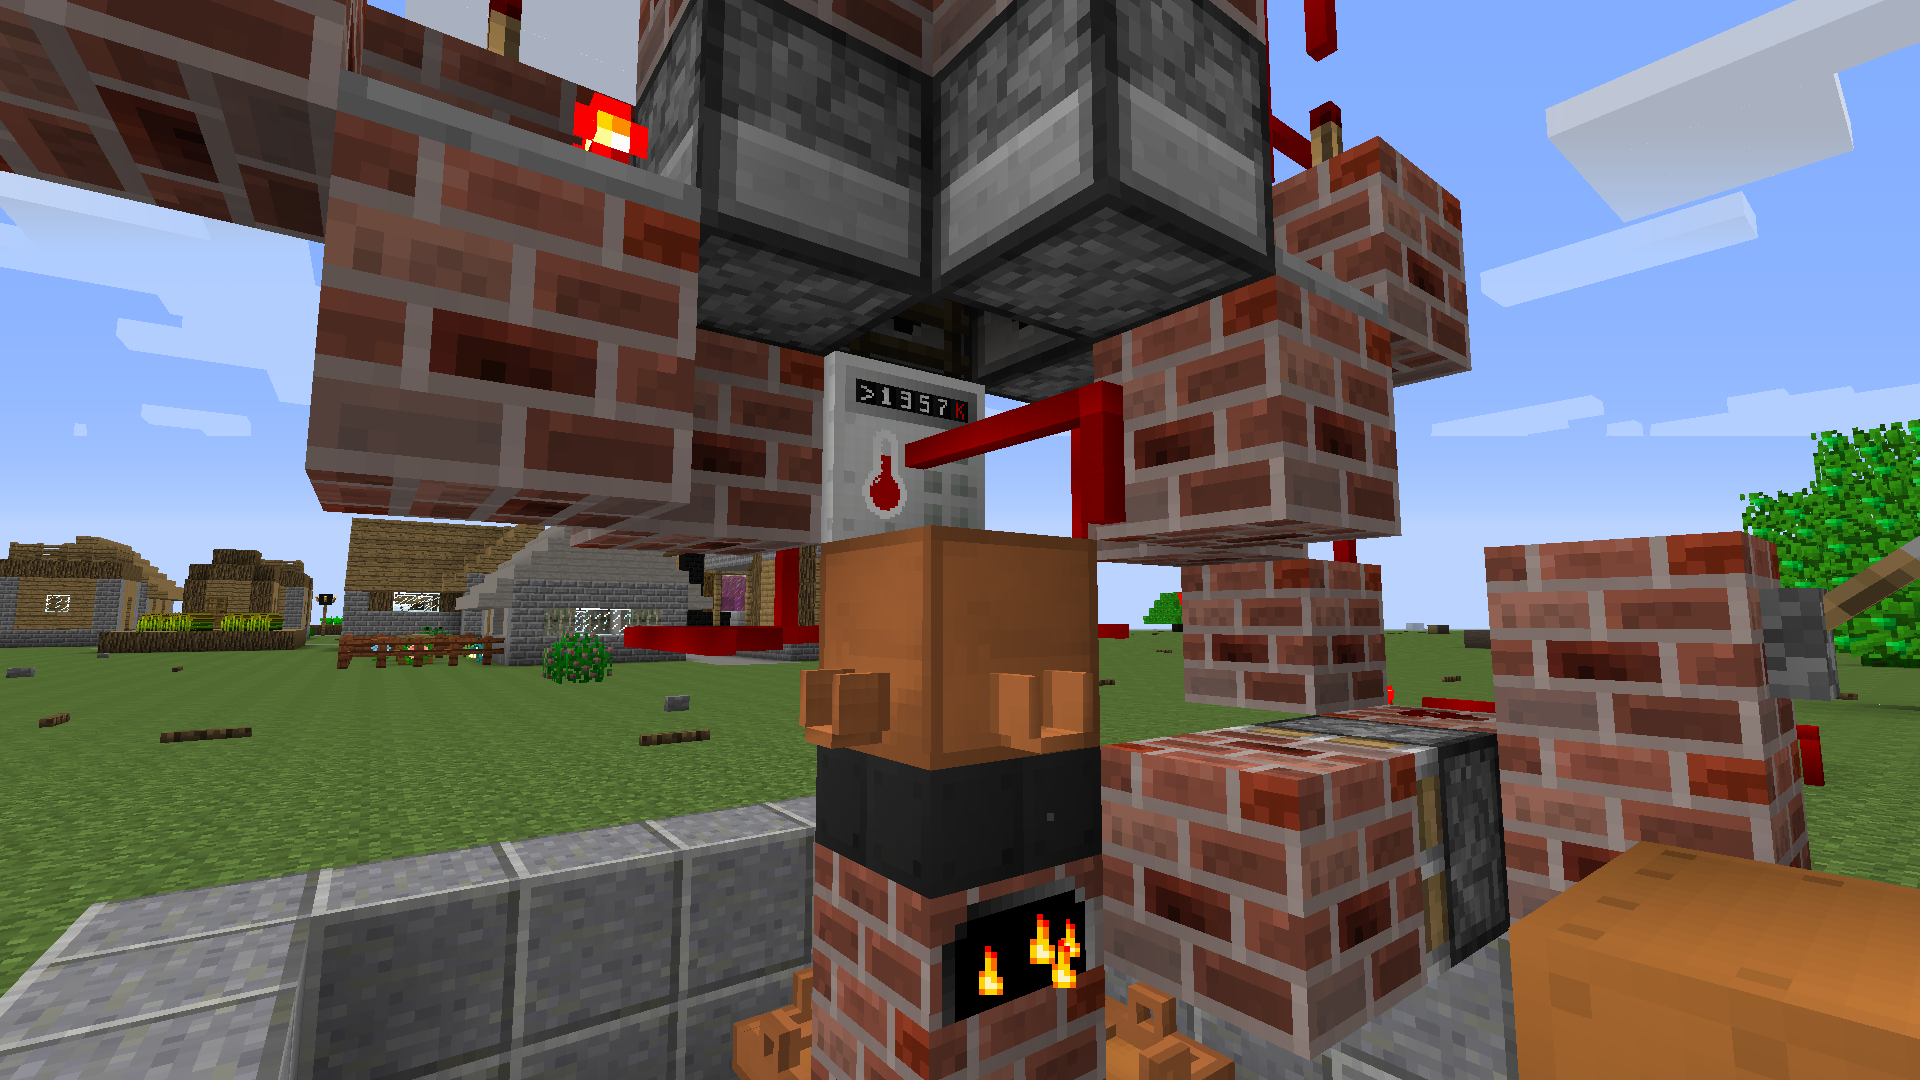
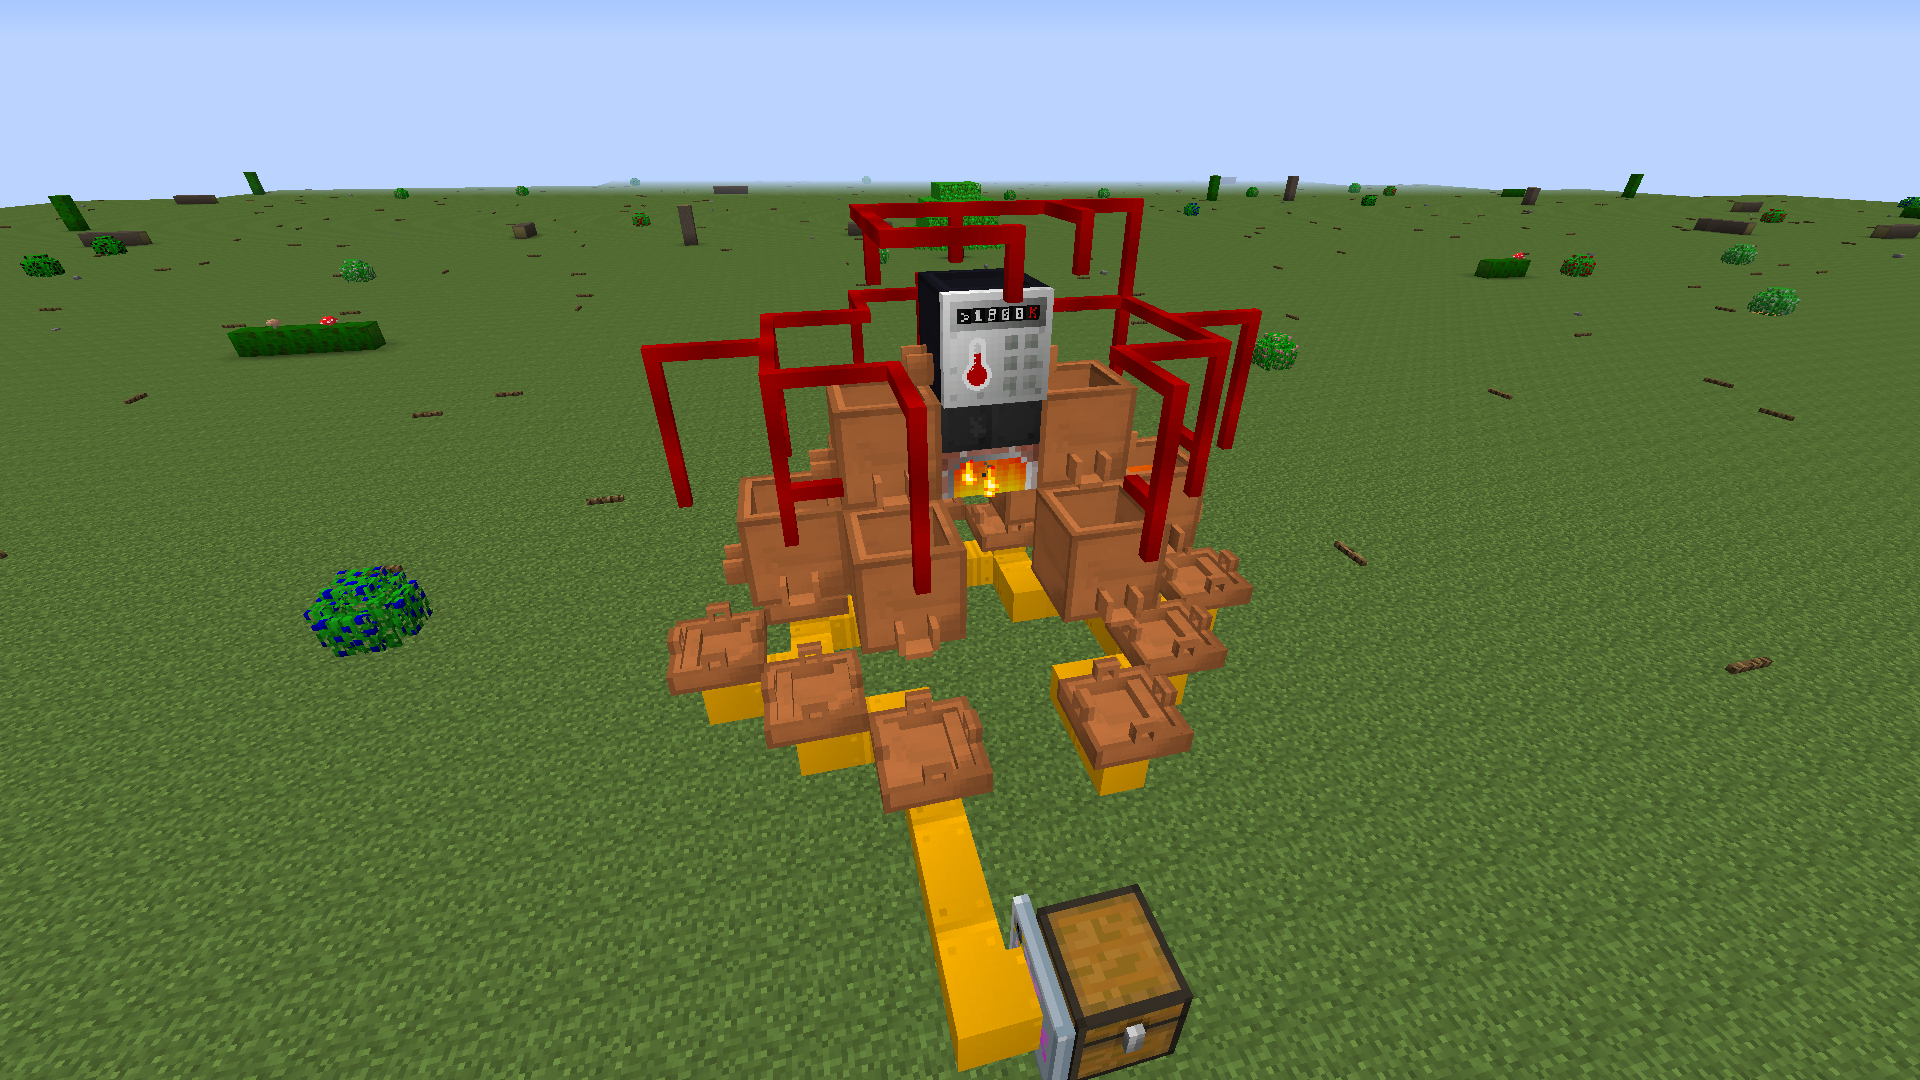
This is a prototype of my setup. In the first image you can see 2 themometers. 1 for the automatic shut down, 1 to activate the mold. In the second image you see the weighometer that send a redstone signal when the crucible is empty to a 1tick pulse generator connected to the hoppers.
edit: Im not really sure if i understood the sensor trick. If you put it on top of the crucible, how do you drop item inside it? I noticed the hopper behaviour while testing, the item go stright down and that is really nice. Then you cant really put mold on the front becouse you cant put the hopper under it, it would be in front of the burning box.
edit2: i forgot to mention that you need a button next to the weigh ometer line to drop the first material and after that this setup is fully automated but you need to use saw/axe/gears mold if the recipe outuput is more than 1 ingot
4 Likes
I did similar automations with yours before, one pure GT and vanilla and one with AE(with more function). I want to try to do it with the new logistics core.
4 Likes
This is my setup that I did in creative. I just recently started playing gregtech 6 so I’m a noob at the mod but anyway. This design is very cheap, only requiring one sensor. It currently makes bronze, but can probably do any alloy. If the temperature reaches more than 1357 K it will cast the bronze to the 4 molds it has and activates the droppers which will shoot 3 ingots of copper and one ingot of tin into the crucible cooling it down to about 400 K.
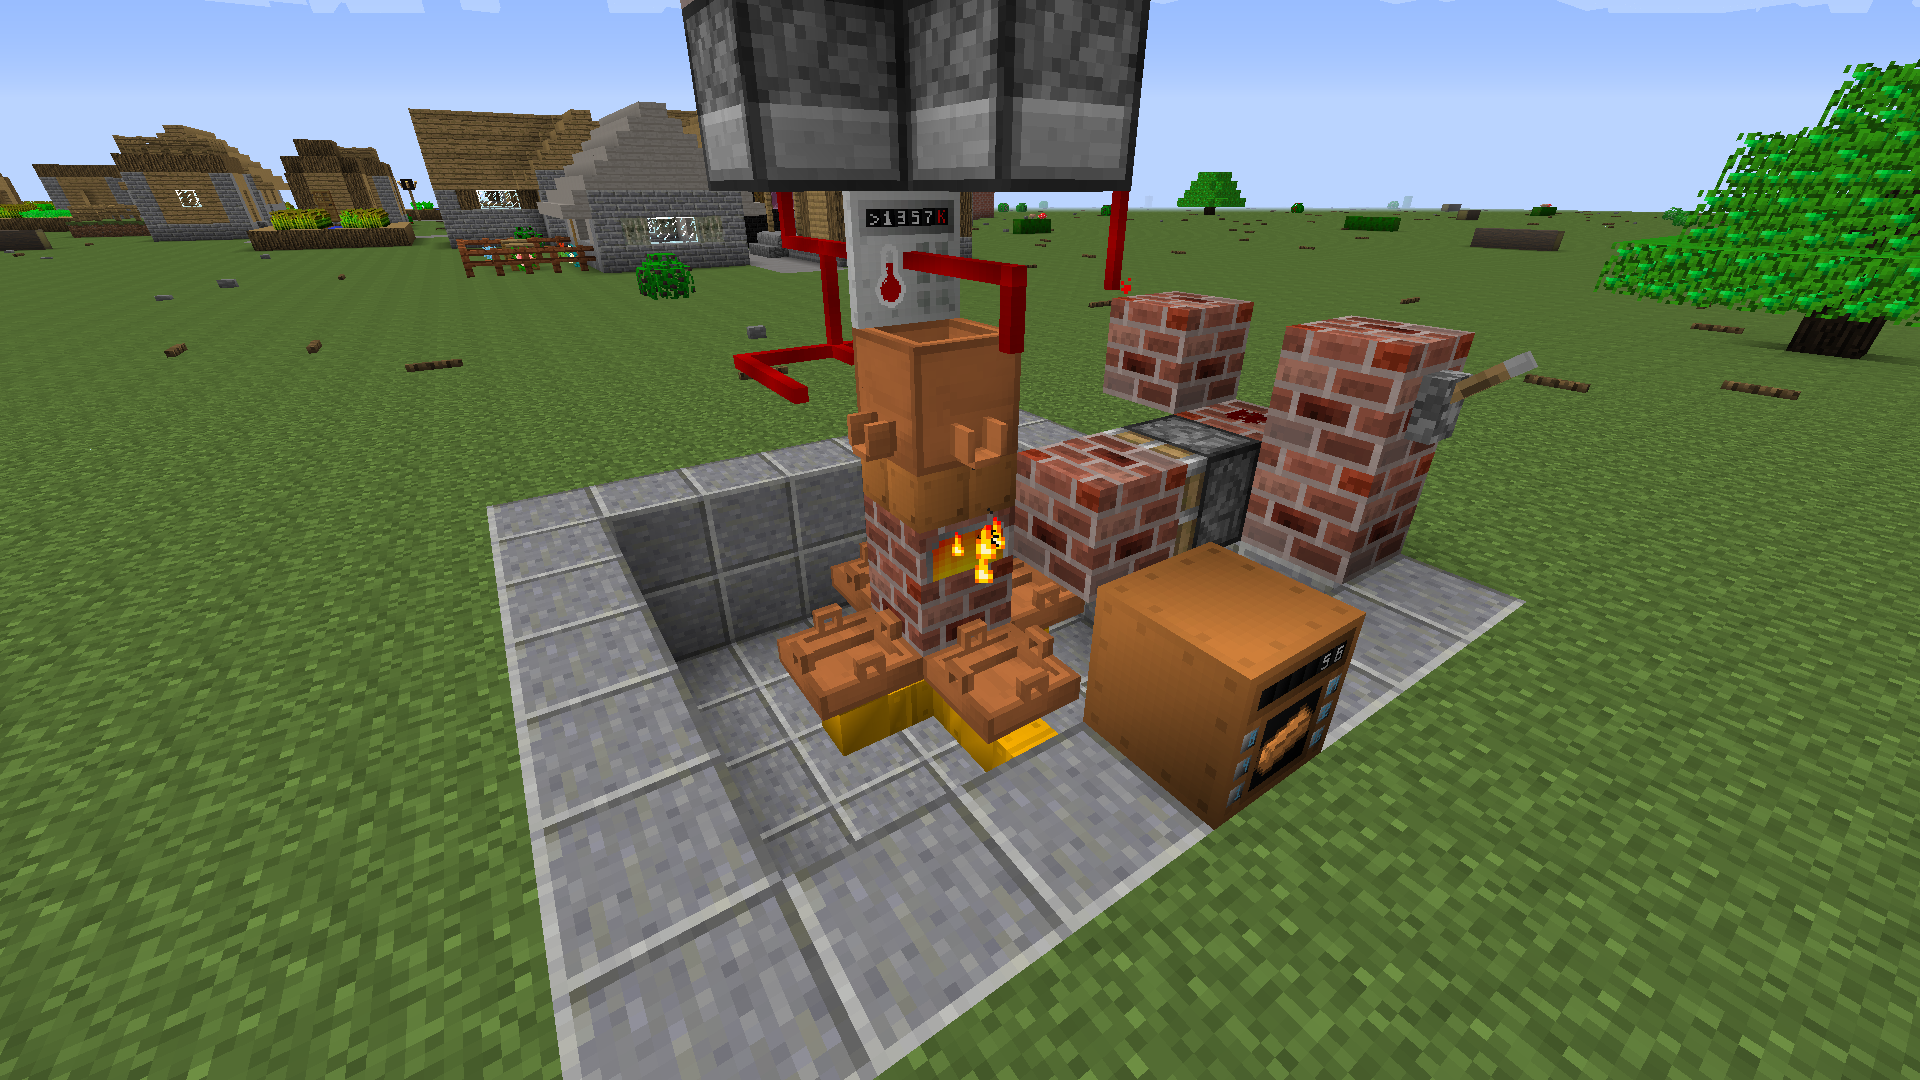
It also has some problems. Firstly it doesn’t shutdown automatically and that’s what the lever on the side is for which blocks the burning box and also disables the droppers, but it doesn’t work all that well. And secondly when the droppers are empty the crucible will melt down but that can be easily fixed with some comparators.
Edit: In the pictures I used a bronze burning box which is slow af, but because of the four molds a tungsten burning box also worked, anything higher tier than that and the metal wasn’t cooling down fast enough. Also the back dropper was only activated by quasi-connectivity which made it dispense a second later than the others for some reason. Just replace the brick block on top of it with a redstone dust.
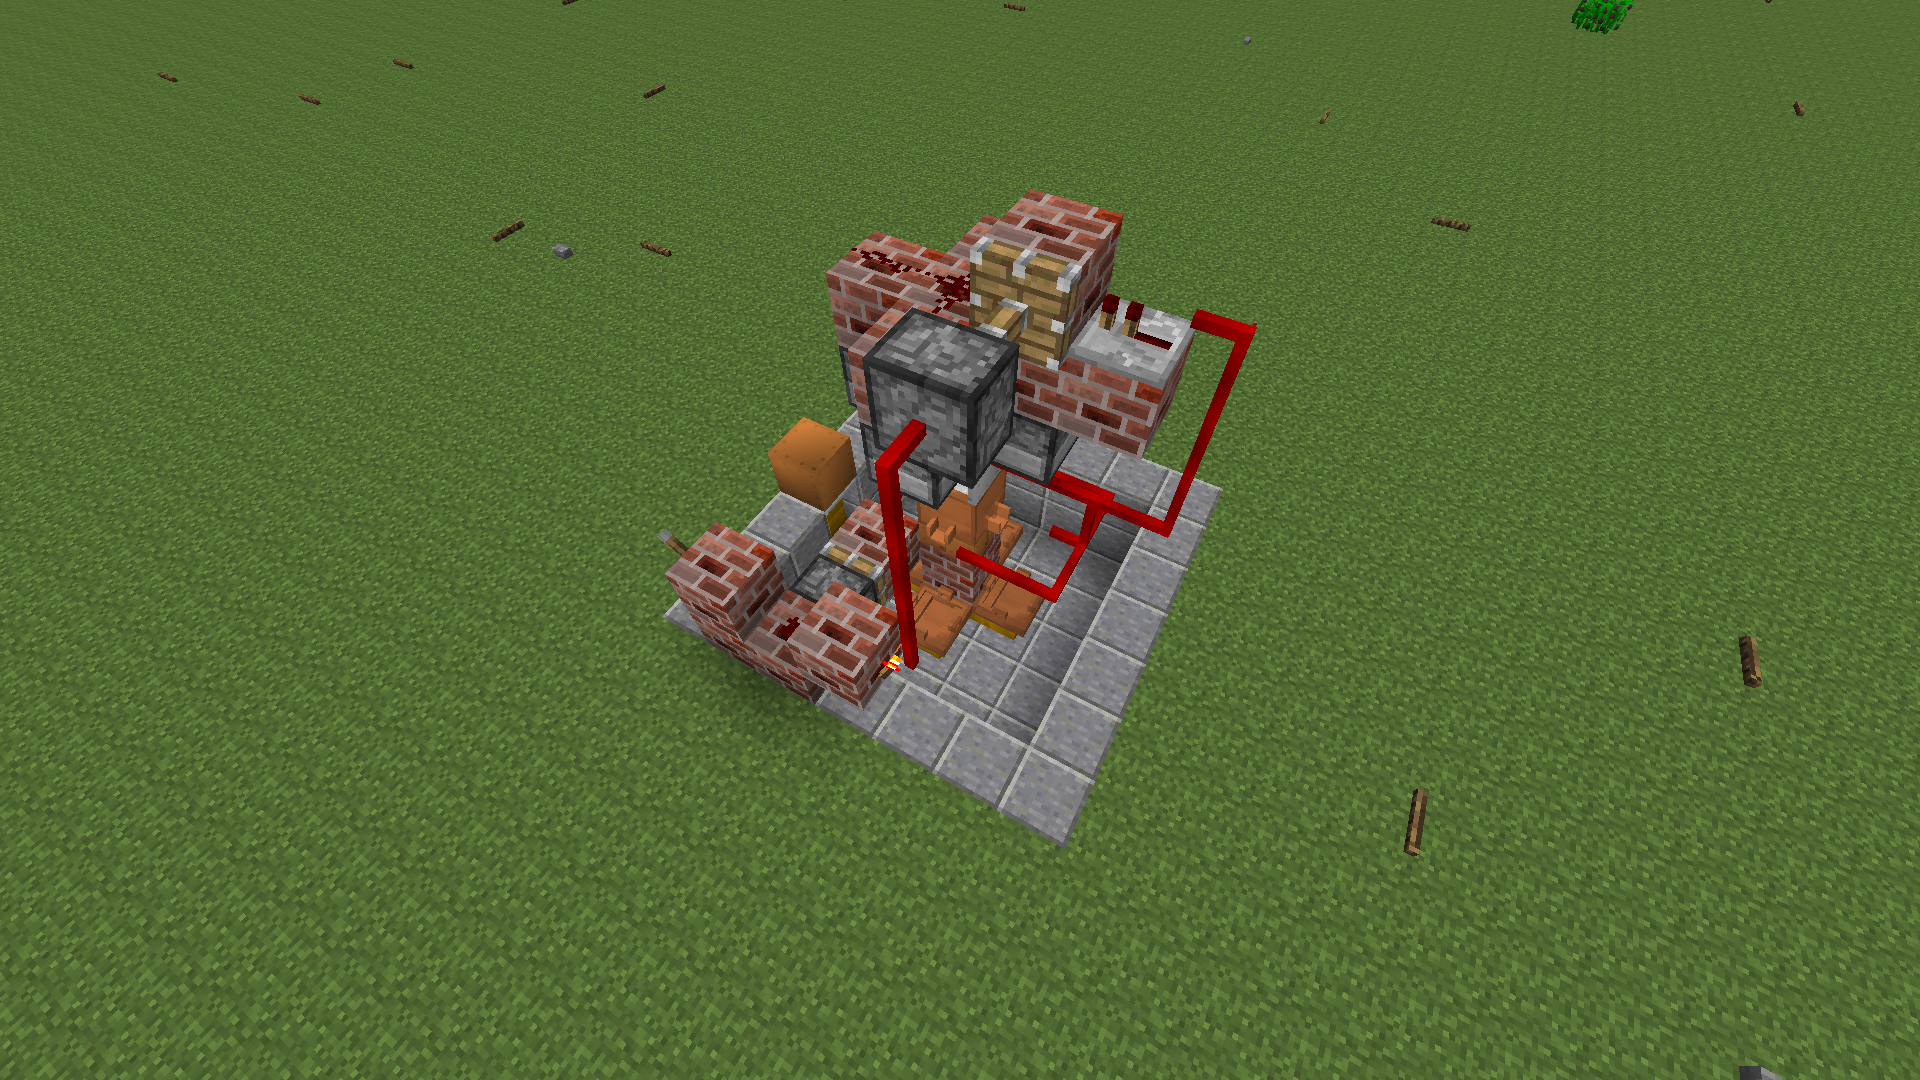
Edit 2: So I redesigned it a little. It’s more bulky than the previous design, but it automatically shuts off when one of the droppers gets empty. The ladder is there to stop items from getting stuck on the sensor.

5 Likes
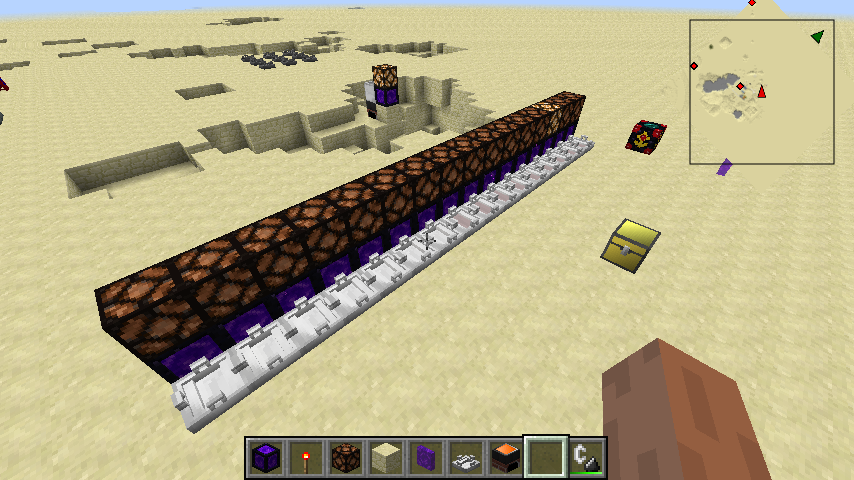
So I just realised that you can use faucets to extract molten metal from one crucible and pour it into another. Sadly this monster didn’t work at all since it always prioritized certain faucets and wasn’t random like I was hoping.
6 Likes
Oho, for some reason I never considered pouring from one crucible into another.
5 Likes
If I remember correctly when you puor in a second crucible the molten metal cool down (the cold crucible soaks part of the heat), so it isn’t very easy to use them for automation.
5 Likes